DIY Acrylic Earring Holder in 10 Easy(ish) Steps
/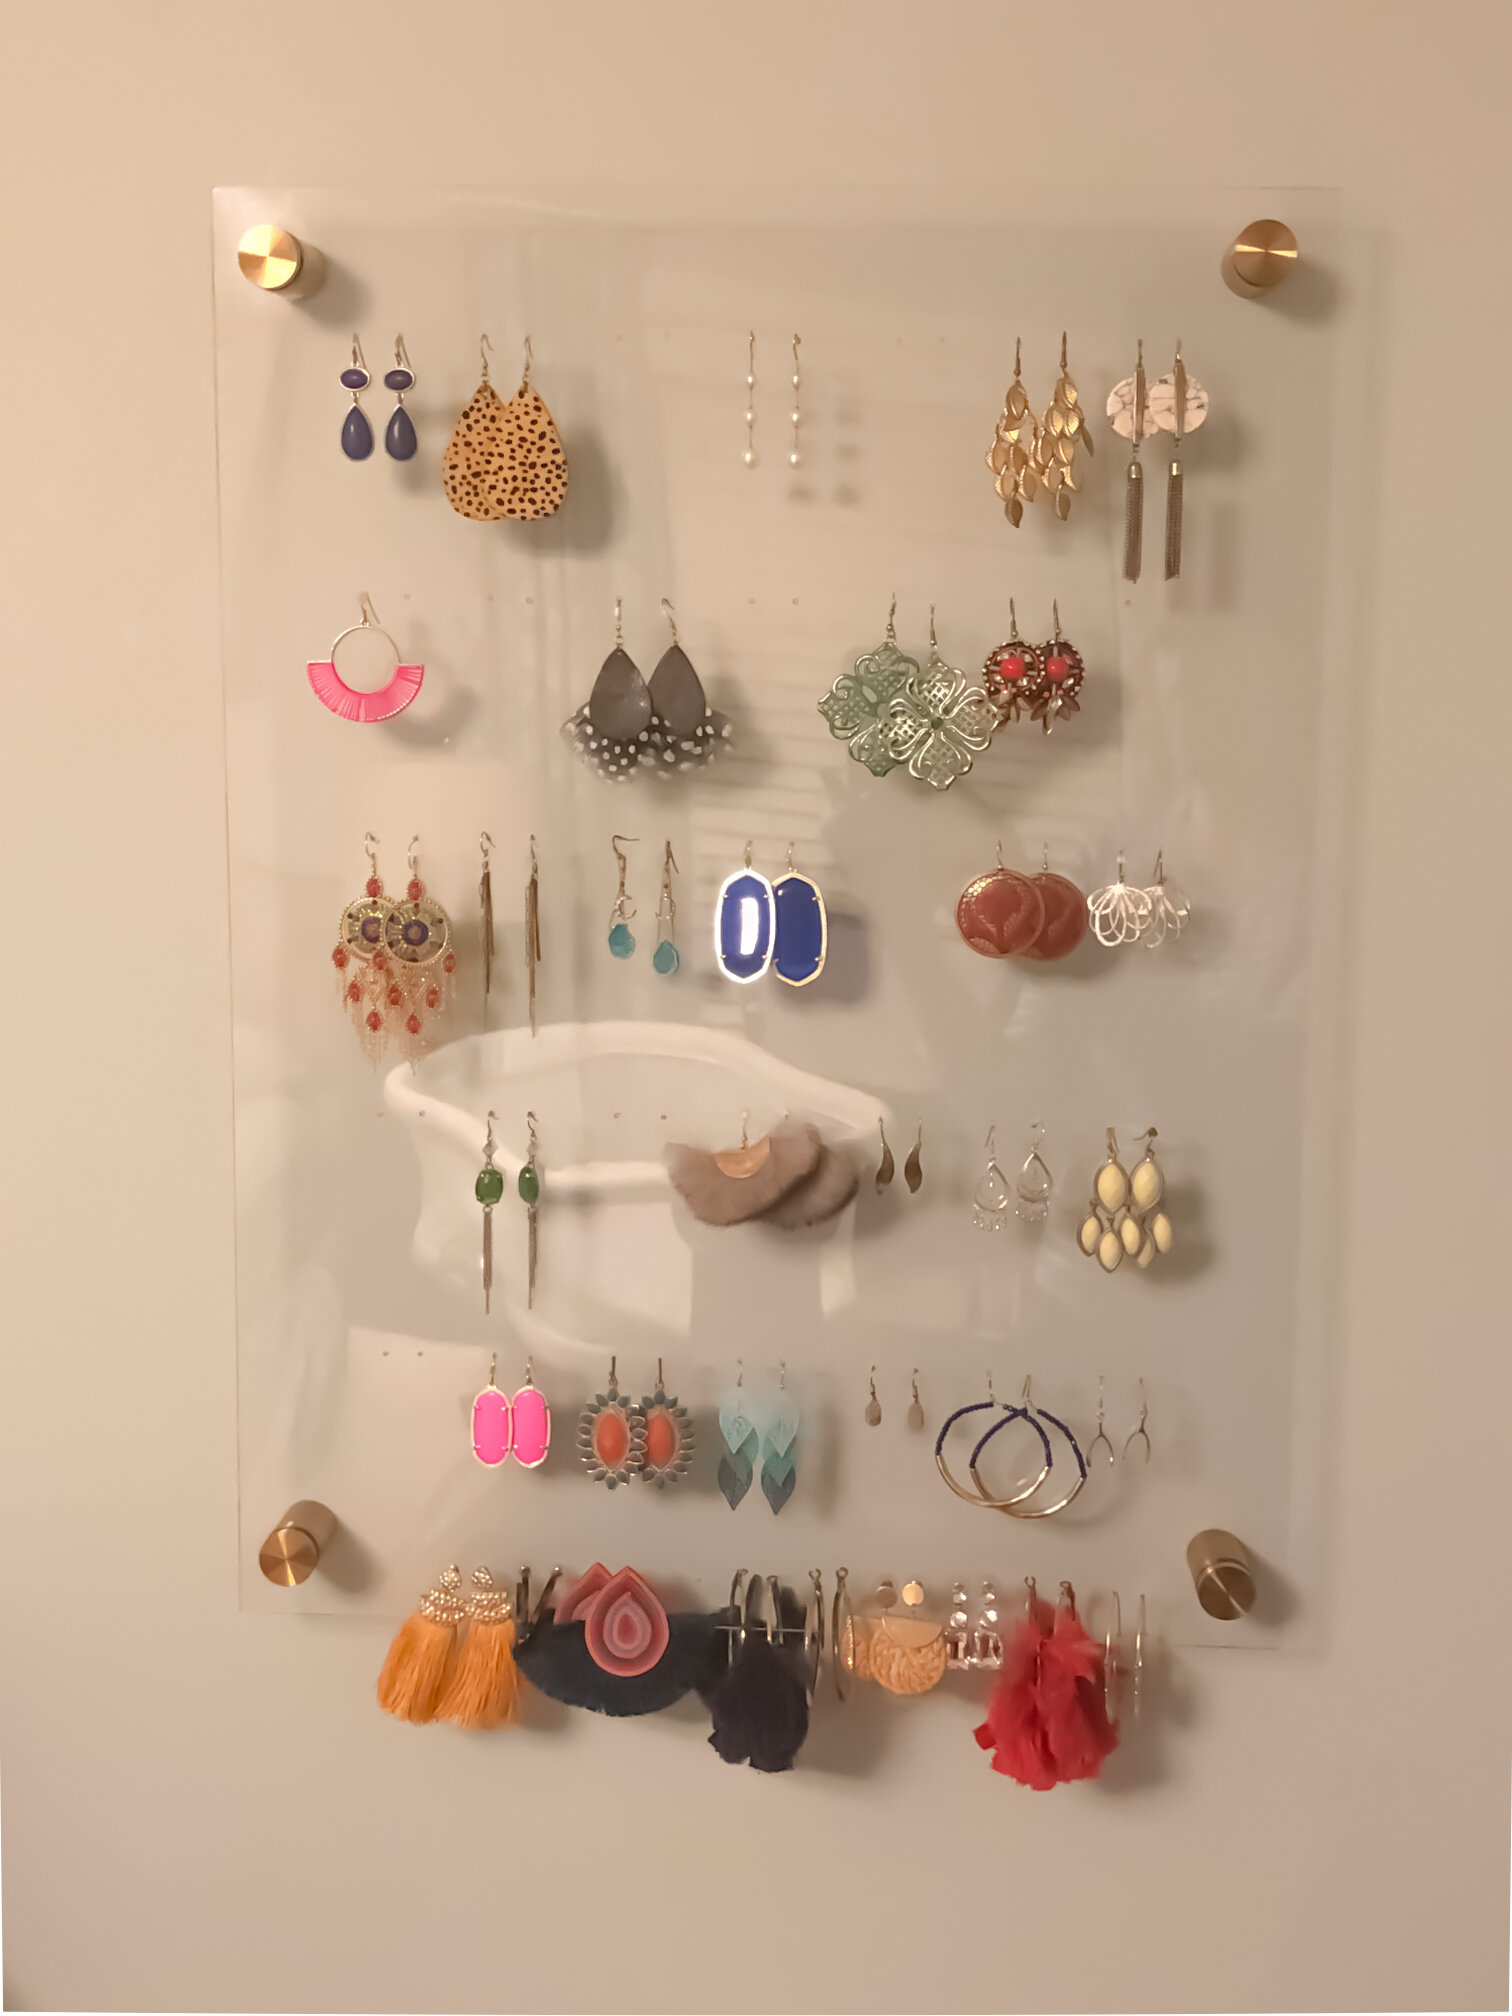
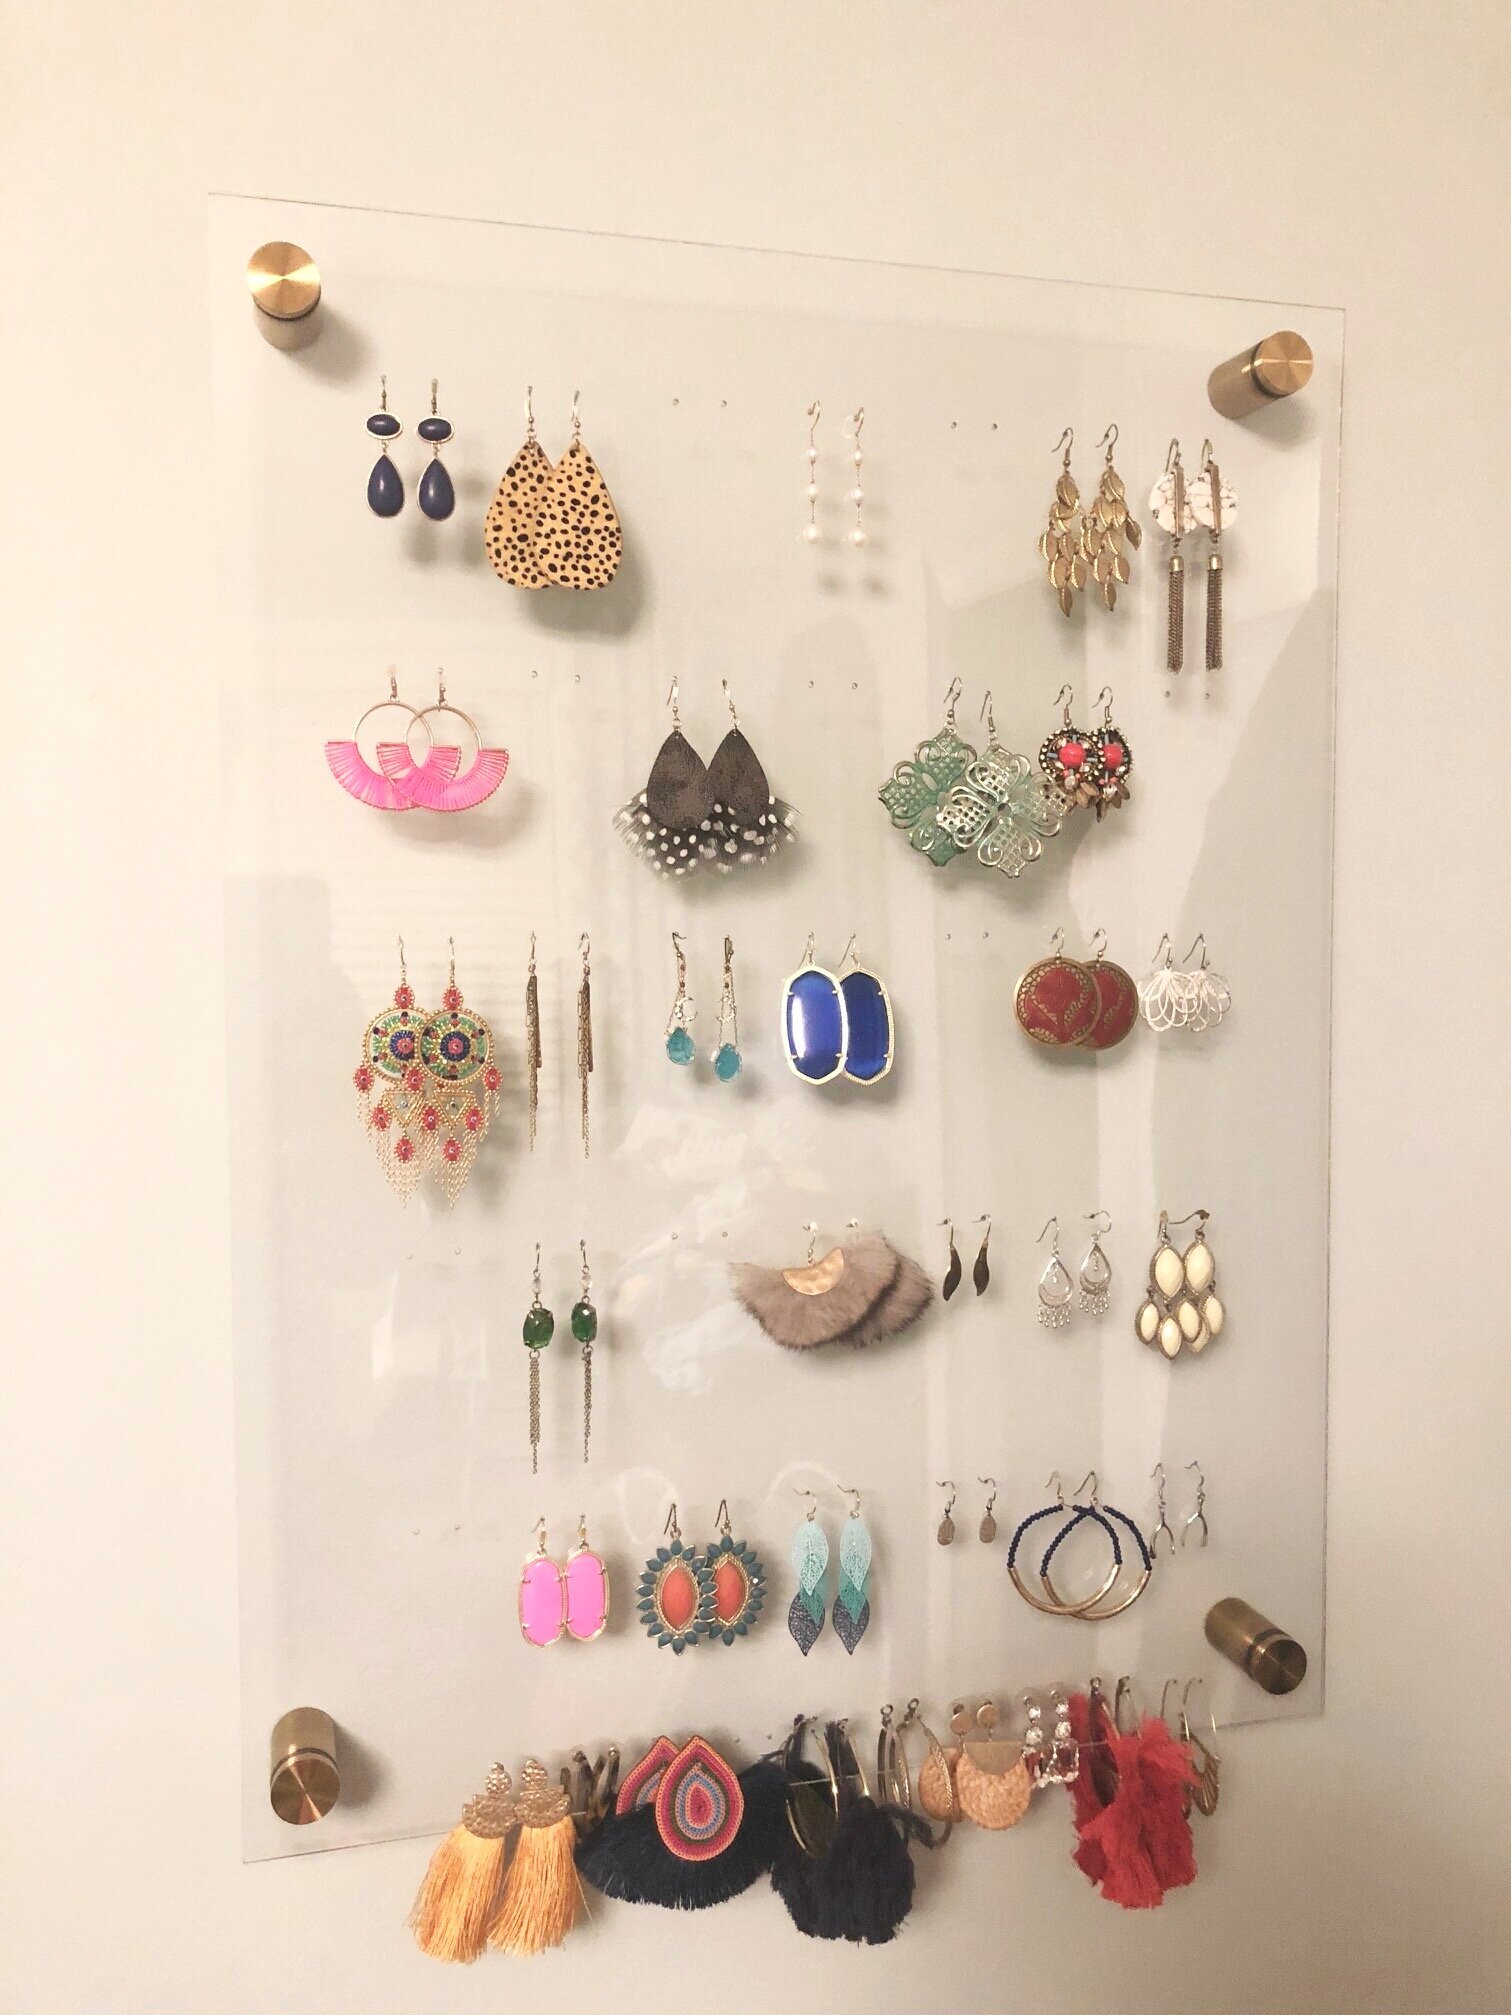
Possibly I’ll take another picture of this earring holder without a bassinet in its reflection. Then again, possibly not.
If you’re anything like me, you have any number of big earrings and nowhere good to hang them. Since I wear earrings so frequently, I like to see what i have in order to decide what i feel like wearing. The trouble, however, is twofold. I haven’t found anything in stores/online which lets me display the number of earrings I have. Also- the earring storage/holders I have found (still not big enough to house all of my earrings, mind you) are frequently insane looking. Super farmhouse-y/inexplicably rustic/too young/curiously steampunk-eqsue/overall terrible.
And, since I have all the free time in the world these days (ha!), I decided to employ my usual plan of action when I can’t find exactly what I want. I made one. I’ve had this same problem for years and made a different earring holder about a decade ago using an 8x10” picture frame and a screen- but I quickly filled it up with too many earrings. Oops.
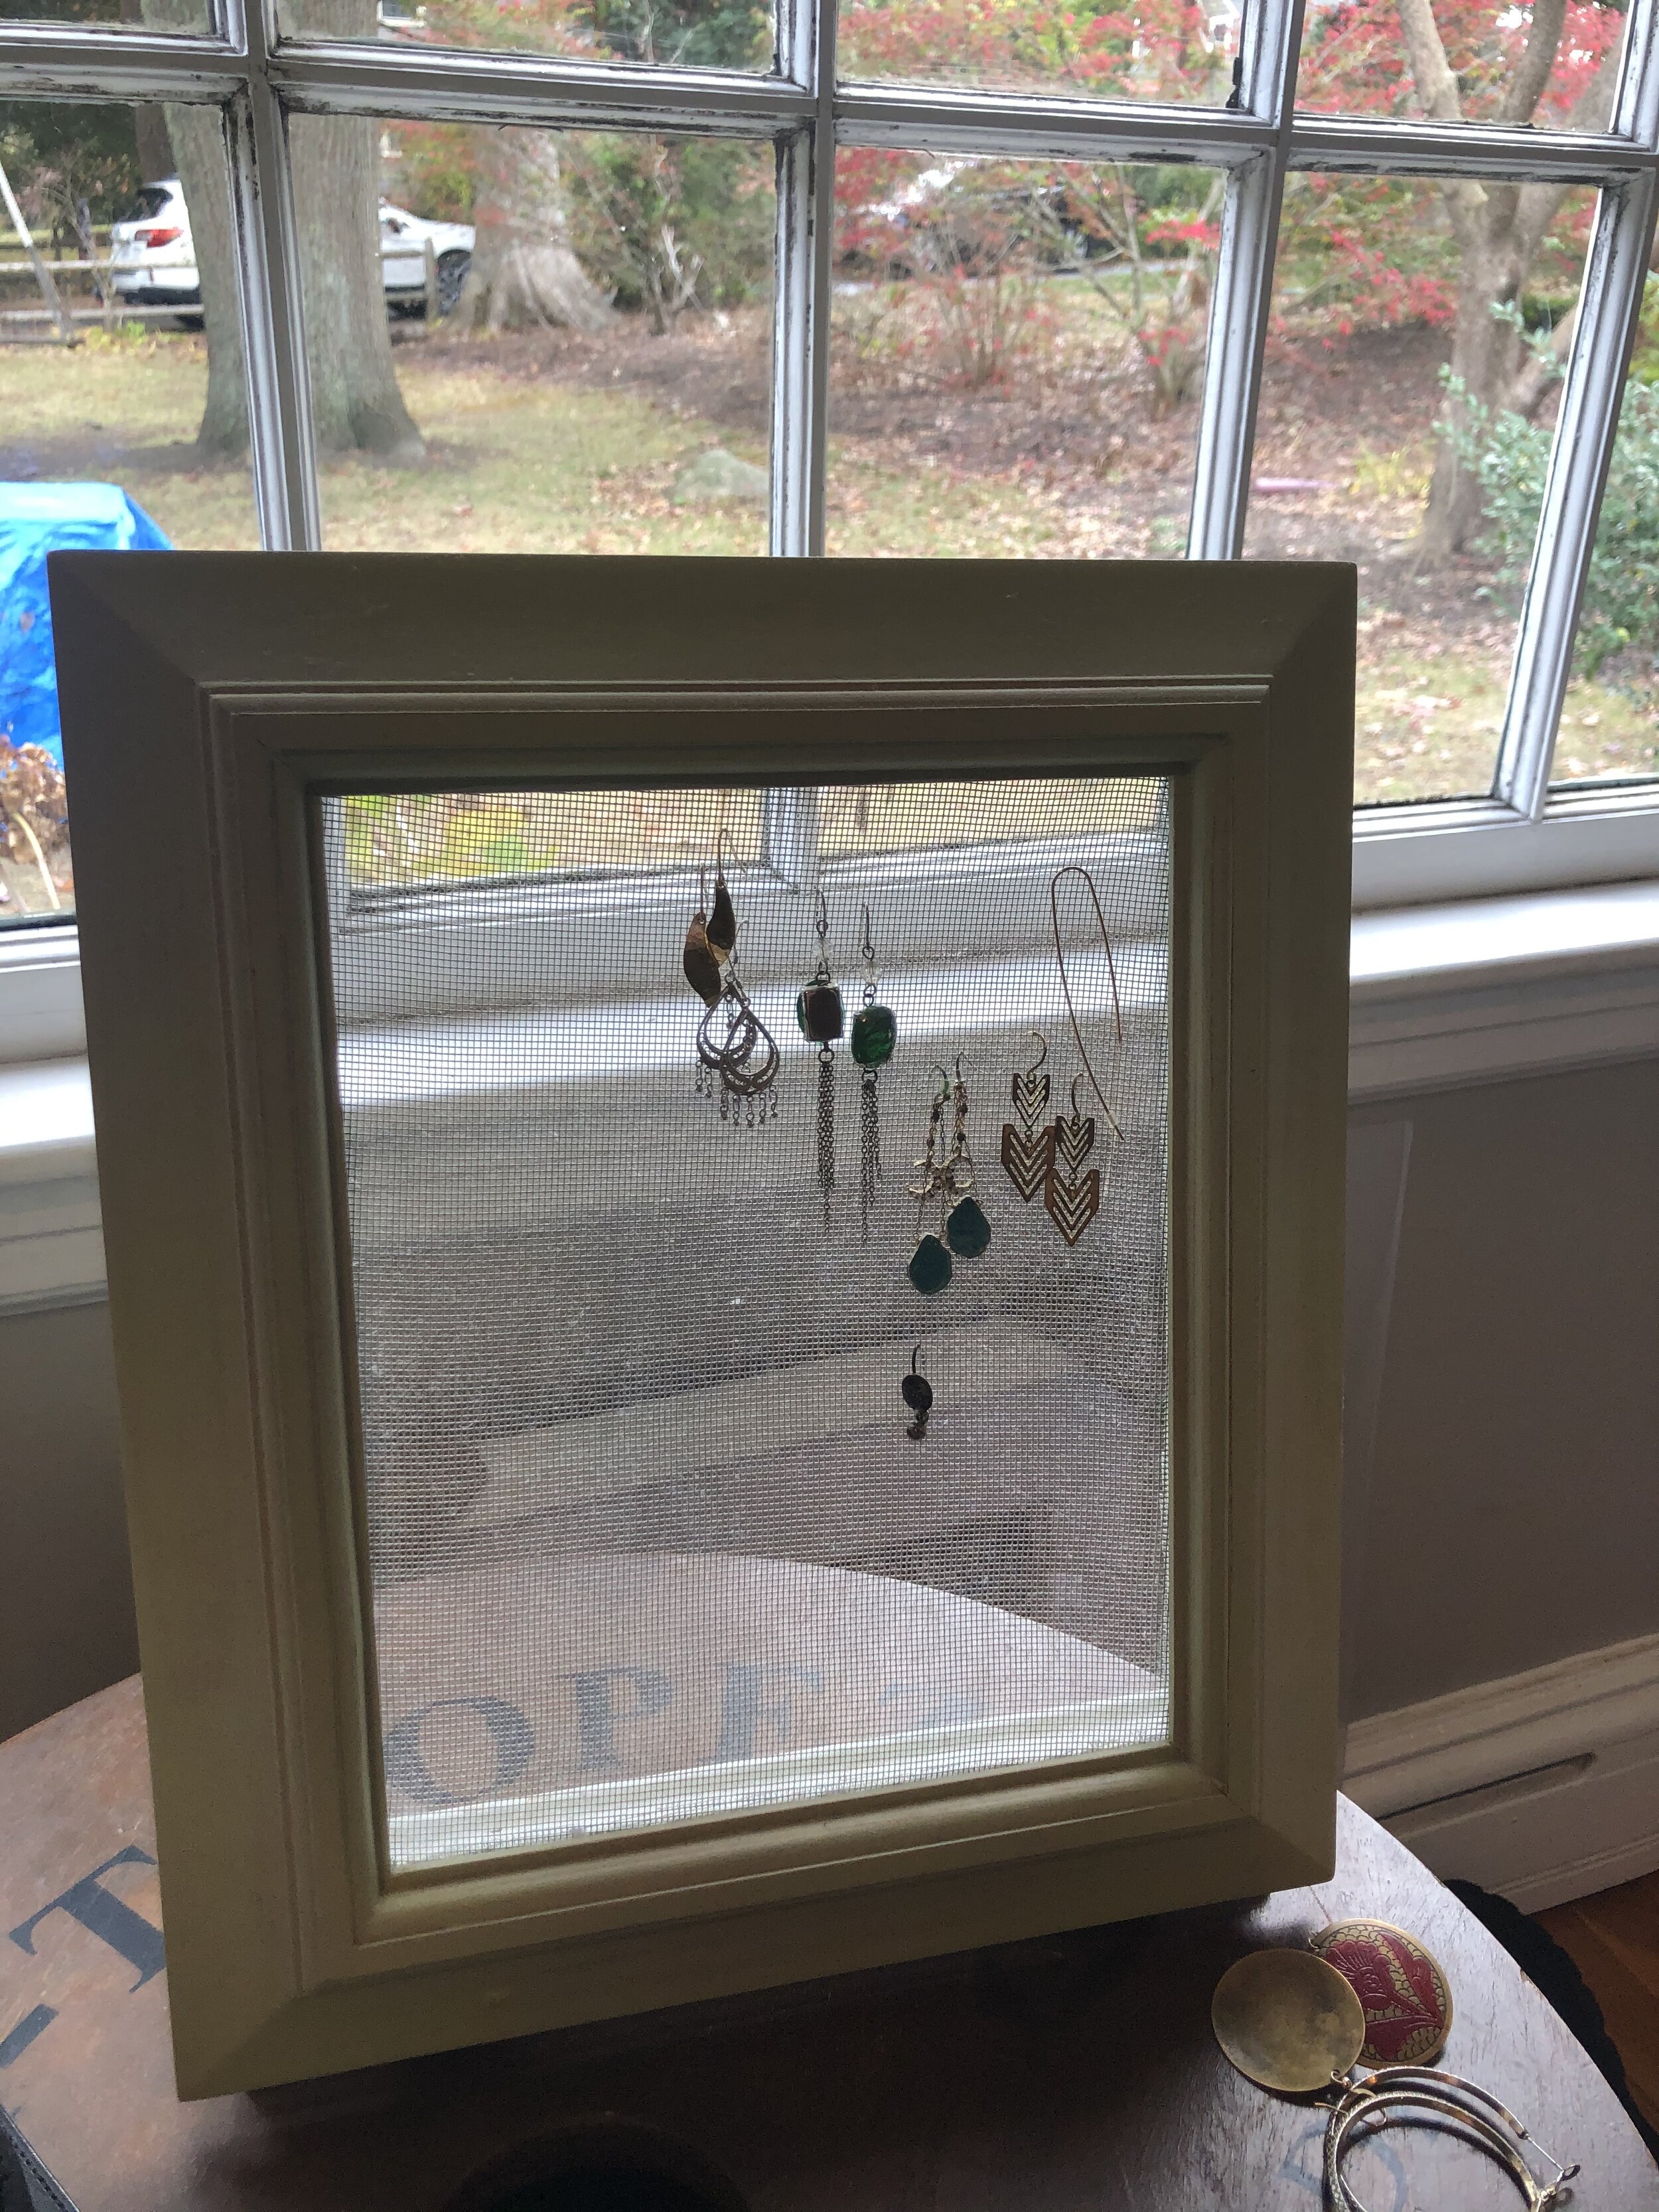
the OG earring holder
Depending on your skill set, I’d call this an easy (but maybe slightly time-consuming-you’ll see why) and inexpensive project. Here’s what you’ll need to get started:
MATERIALS:
-1 sheet of acrylic (I used an 18x24 sheet bc I have too many earrings and they’re huge but as a normal, non-hippie, you can likely get away with a smaller piece. **Also, if your local hardware store carries a piece of acrylic of this size in the $12 range and another that’s about $10 more, opt for the cheaper one. It won’t collapse under the weight of your earrings and if will save you from buying like 1 million more drill bits trying to get through it)
-Wall sign holders (I wasn’t actually sure what to call these when I Googled them but these are the ones I used. These come with wall anchors, they’re cheap but will do the job. If you’re bad at hammering in cheap anchors, you might want a few extra on hand as backup as they’re easily squashed)
TOOLS:
Drill (for drilling holes into the acrylic)
Drill bits (1/16” for drilling into the sheet, possibly a step bit -but only if you already have one.. I’ll tell you how to make it work without it as buying one will basically double the cost of this project, another bit for attaching it to the wall-will update the size of this bit shortly)
WD40 (Confusing, I know. But necessary if you don’t own a step drill bit. I feel like I have a million tools and have never needed one of these so am assuming most people don’t have them either)
Pencil (for marking holes on the wall when you go to hang this thing)
Yardstick/measuring tape (to measure distance between holes when marking them)
Straight edge (for ensuring the holes you drill aren’t all crooked) If you have a yardstick, that works too
Permanent marker (for drawing lines on the piece so you’ll know where to add how)
Pieces of scrap wood (so have something to set this on to avoid drilling into a floor or table)
Philips head screwdriver (to attach to the wall)
Hammer (for hammering in the wall anchors)

Some things you’ll need
IMPORTANT
Before you buy the piece of acrylic, take stock of your earring situation. How many do you have now? Are they small-ish or large-ish? Any weird ones you’ve been hanging onto for years that can be purged? Both the size/quantity of your earrings will determine what size piece of acrylic you need. When I counted/semi-purged (still a weird pair or three in the mix), I had 35 pairs. A minimalist. Clearly.
Oh- one more thing, and this is important. I know, blah blah blah, no one wants to read the top parts of blogs but definitely give this some thought if you decide to make one of these earring holder. This earring holder only works for earrings with a fishhook back. It’s no good for a dangly earring with a post back because you somehow have to squeeze your hand between the back of it and the wall to put the earrings on and off. Of course I have a handful of large earrings which are either hoops or post-backs… so I tried to get around this problem by making a row of holes at the bottom of the acrylic so I’d be able to access them.
Ok, let’s get started.

Lay out your earrings on your future earring holder to help with spacing.
So you’ve taken stock of your earring inventory and bought an appropriately sized piece of acrylic. As I mentioned above, get the cheaper, slightly flimsier piece. The first time I made this, I used the thinner acrylic with great success… until I got to the final step of drilling larger holes in the corners to fit the pieces that attach it to the wall. THEN I used a drill bit that was too large/didn’t use WD40 (who knew I needed to lubricate the drill bit? Not me) and I cracked the earring holder. On the very last step. Womp womp. When I went back to the store to buy a replacement piece of acrylic, they were sold out of the thinner piece and only had a thicker, pricier piece. And curiously, I was IN A HURRY TO GET IT DONE (?!?!) and bought it anyways. The thicker piece ate up my drill bit and a subsequent three pack of replacement drill bits. #livinthatDIYdreamlife
Step 1
Keep the plastic on both sides of your piece of acrylic to help protect it from scratches as you work. Depending on the size you’ve settled on for your earring holder, measure down 1- 2” from the top and then in from the edge that same measure (..if you go down 1”, go in 1”… if you go down 2”, go in 2”). Use a permanent marker to mark the holes you’ll drill at the end for the wall anchors. I drew a tiny “x” in each corner so i’d know each mark had been made on purpose. Repeat in the other three corners.

Mark the lines where each row will go. Forgot to take a picture of this step so instead this picture is from slightly further along in the process!
Step 2
Measure how many rows of earrings you’ll need. On my 18x24” piece, I ultimately had 6 rows (5 regular rows and 1 at the bottom). If you settle on a similar setup, you’ll use a yardstick and a permanent marker to measure and draw my first row, roughly 2.5” down from the top edge of the acrylic. Then, I measured 3 1/4” down from that row and used my permanent marker and yardstick to draw a straight line from one side of the acrylic to the other. Then I repeated this step 4 more times, with my sixth/last row about 3/4” up from the bottom of the piece. You’ll want this last row close to the bottom of the earring holder so you can access any earring backs or backs where the earring hooks onto itself to close.
Step 3
With all 6 rows traced, it’s time to use your marker to mark the holes you’ll drill for your earring pairs. Based on all of my earrings, I decided that each of the top 5 rows should hold 7 pairs of earrings. To mark them off, measure 1-2” in from the left side of the acrylic to mark a dot for your the left earring for your first pair and then measure 1/2” over and mark a dot for the other earring of that pair. (You’ll mark 2 dots for each pair of earrings-obviously). Measure over 1 1/4” and mark your next dot and then measure 1/2” to mark the second dot for that pair. You now have 2 pairs marked off for your first row. Measure and mark off the remaining 5 pairs for this row. Then repeat this for the next four rows. (I measured 1 1/4” between pairs because I have some larger earrings and didn’t want them all over each other. Yours may be less obnoxiously large, in which case, you can probably make your earrings closer together.
Step 4
Measure 2 1/2” from the left corner and 3/4” up from the bottom. Mark holes for the earrings on your bottom row. On mine, I marked off 22 holes (enough for 11 pairs of earrings). Measure in X” and mark your first hole. Then measure over 1/2” for the second earring in that pair. Measure over 1/2” to mark the left hole for the next pair and then measure 1/2” to the right and mark the right earring of that pair. Repeat 9 times.

Here’s about where this picture belongs. With holes drilled for the pairs of earrings.
Step 5
Now that you have all of your holes marked, it’s time to drill. We’ll save the corner holes for the end since those are slightly trickier. Set up your acrylic piece on top of some scrap wood. You’ll need a piece of wood underneath to project your work surface. Attach a 1/16” bit to your drill and begin drilling the holes you’ve already marked in your earring holder. You’ve already done the prep work so this shouldn’t take long.

Clearly not a professional DIY blogger! I used painter’s tape over the corner holes as I drilled for extra protection of the acrylic. Didn’t want to scrape it up too much!
Step 6
Time to tackle the corner holes. You’ll need bigger holes (1/4”) in the corners and your earring holder will crack if you try to use a 1/4” drill bit on it. So this step is slightly more involved. If you happen to have a step drill bit, use it here. (It’s basically a graduated drill bit that starts by drilling a small hole and as it gets deeper, drills a wider hole until you reach the width of the hole you need (1/4”). I don’t have a step bit so had to find a way to Macgyver this. Enter WD-40. In order to get through the plastic, you’ll need to lubricate the drill bit and go slowly. WD40 makes a greasy mess so be sure you’re doing this step on somewhere you can get messy/is easy to clean up. I began by using my 1/16” to drill each corner hole. Then I removed that drill bit and replaced it with a slightly larger one and then sprayed the drill bit and the surface of the acrylic with WD40 before slowly drilling. Once enlarged, I switched to a slightly larger drill bit and sprayed both drill bit and surface with WD40. Then I switched out my drill bit to a 1/4” bit, sprayed again with WD40 and verrrry slowly drilled the existing hole. You’ll repeat this process for the remaining three corner holes. Before you move on to the next step, poke one of your wall holders through each hole to be sure it’s large enough. If the edges of your hole are a little wonky, that’s OK as the hangers will cover the hole.

In case you aren’t familiar with a drywall anchor.
Step 7
Once you’ve ensured that the wall hangers will fit in each hole, it’s time to remove the protective plastic and wipe down your acrylic. You’re almost there!! Find the spot you’d like to hang your earring holder and hold it up to the wall. Use a level to make sure it isn’t crooked- you may need another set of hands for this step. Use your pencil to trace the inside of the circles at each corner. The earring holder isn’t very heavy so you don’t need to bother finding the studs but you will want to use drywall anchors. Once you’ve drilled a hole for the drywall anchor, insert it into the wall. It won’t always go all the way into the wall so you’ll want to use a hammer to hit it head-on so that it’s flush with the hole. Repeat this step for the remaining three corner holes you’ve drilled into your wall.
Step 8
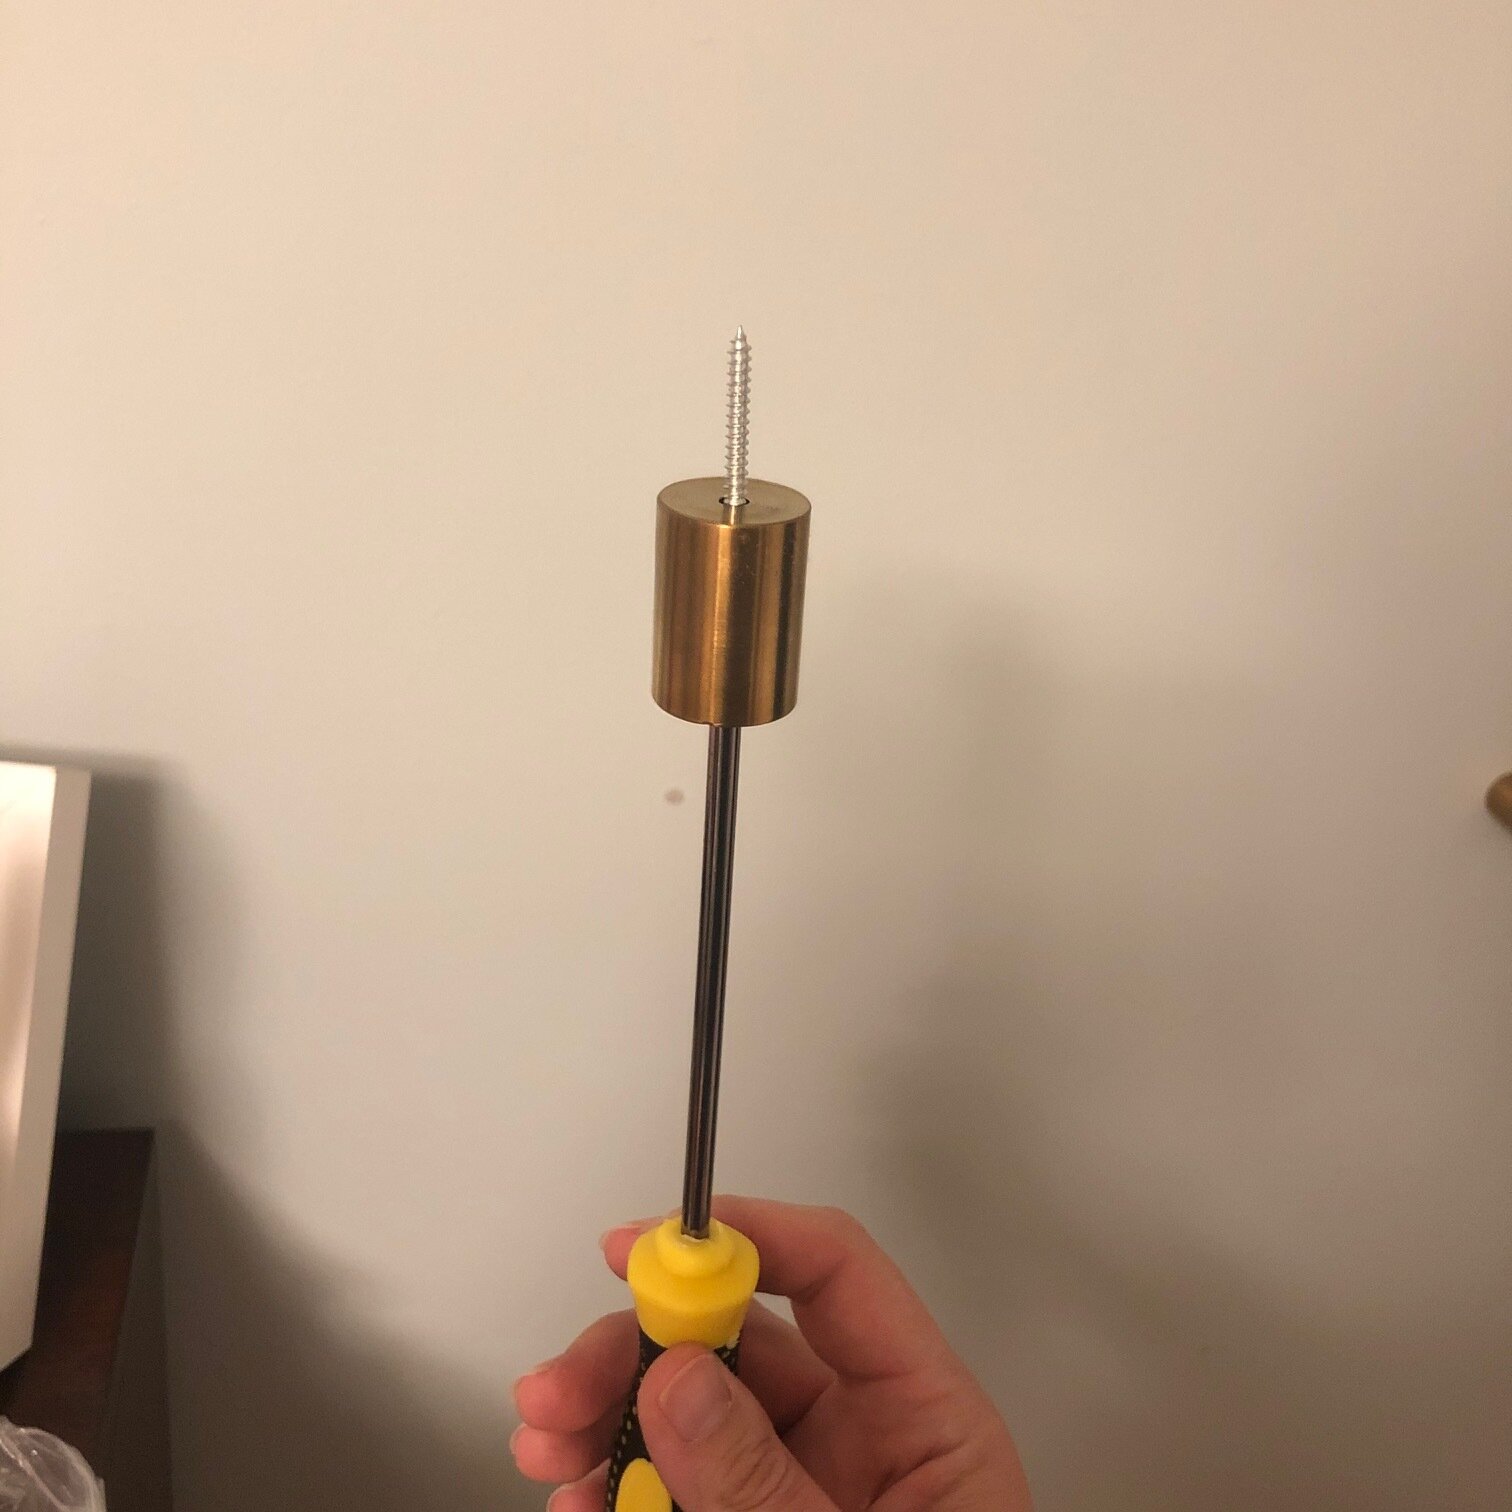
Screw the back of the wall holder into your wall. To do this, start by holding the screwdriver like so.

Screwdriver with screw. Vertical so you don’t lose track of the screw.
I know this seems like a silly view of a screwdriver bc, duh, that’s how it looks with a screw on it. BUT I’m trying to save you the step of holding everything horizontally and then losing the screw inside the wall holder and having to shake it around for a bit to get it out before trying again. With your screwdriver/screw situation looking like that, fit the wall holder over it so it looks like this.
Screwdriver with wall holder. Ready to be attached to the wall.
And then screw it into the wall. Now it will look like the picture below and you’ll repeat this same process for the other three holes.

Look at you making moves.
Step 9
Now that all four corner pieces are attached, it’s time to attach your earring holder to the wall. Drilling anchors into the wall and then attaching something always makes me hold my breath a little when I go to hang it - but hopefully you haven’t goofed anything up and this part goes swimmingly. Fingers crossed.
The top pieces of the wall holders have a screw attached. Hold up the earring holder to the wall so the corner holes align with the wall holders and then screw your first wall holder together. Repeat for all three corners.

Yess!! Look at this masterful earring holder! What a project!
Step 10
Eek! You did it! Time to put hang your earrings on your new earring holder. So exciting! Now it’s time to put on a particularly dangly pair, grab a cocktail and admire your handiwork. Girl, you’ve earned it.
Clearly I’m not a professional DIY blogger so I’m hoping that the above directions make sense. I couldn’t find any such products on the market (nor could I find tutorials to make an earring holder that looks like this one) so I wanted to share in case anyone out there is looking for something similar. I was so tired of my existing earring storage issues and wanted to make something work. If you’re also desperate enough to attempt this, please let me know how it works out!